
Free Beginner Crochet Bunny Pattern Tutorial
Who doesn’t love a soft, squishy crochet bunny peeking out from an Easter basket or sitting on a nursery shelf? This little project brings instant smiles.
Grab some yarn, and you’ll have a finished friend in just a few evenings. Perfect for gifting, decorating, or simply hugging.
Nothing beats that moment when the ears flop just right and it suddenly looks alive.
Imagine handing one to a child—or keeping it for yourself. No judgment here.
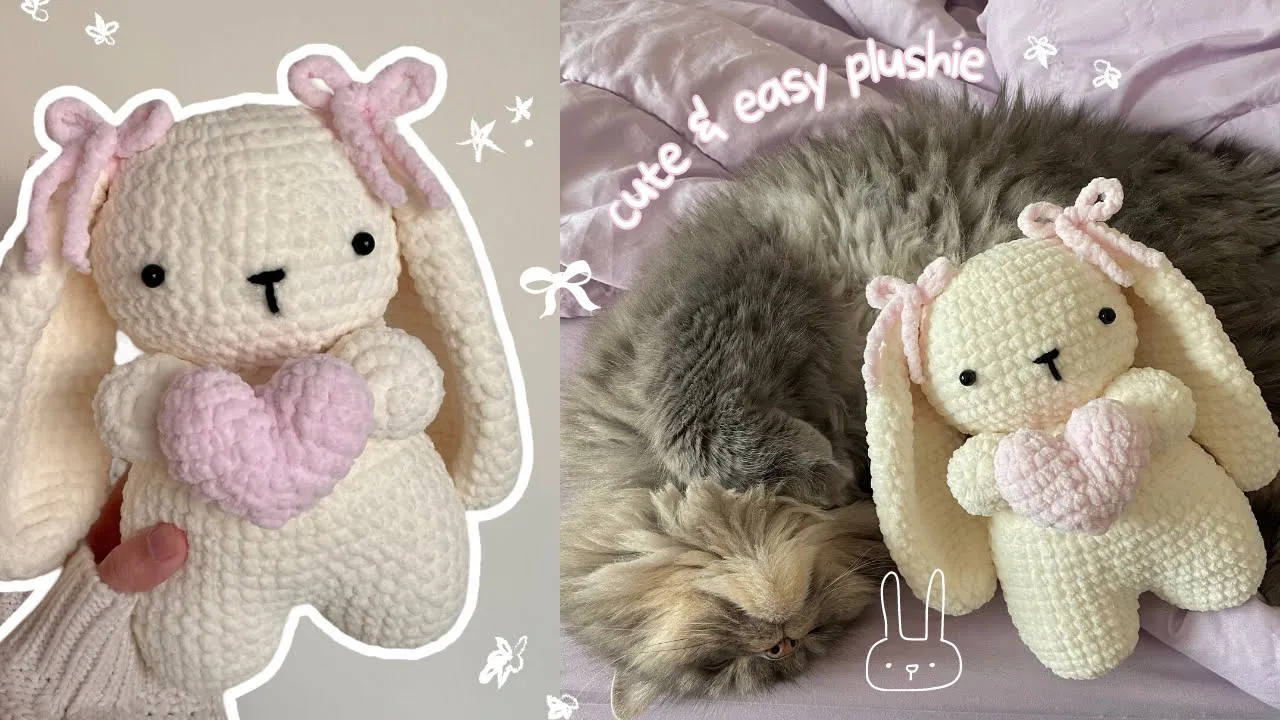
Why You'll Love This Free Crochet Bunny Pattern
Bunnies hold a special spot in the amigurumi world—timeless, versatile, and endlessly customizable.
Switch up colors for pastel spring vibes or bold shades for year-round play.
They make fantastic quick gifts that feel thoughtful without hours of complicated stitching.
Worsted-weight acrylic runs about $4–$6 per skein these days, so the whole bunny costs less than a coffee run.
Add a little bow, flower, or carrot, and suddenly it’s personalized.
One crocheter turned a simple gray version into a “reading buddy” for her niece—now it sits on the bedtime story pile every night.
Materials Needed for Your Free Crochet Bunny Pattern
Gather just a handful of supplies, and you’re ready to hop right in.
Most of this pattern uses about 100–150 yards of main color yarn, plus small amounts for accents like cheeks or a bow.
Safety eyes add that sparkle, but embroidery works beautifully if it’s for a little one under three.
A bit of poly-fill stuffing—grab a bag for around $6–$8 these days—keeps everything fluffy.
Sharp scissors, a yarn needle, and a few stitch markers round out the basics.
Last time I made one for a baby gift, I forgot the markers and spent way too much time counting—lesson learned.
These simple items turn into pure magic once assembled.
Best Yarns for Free Crochet Bunny Pattern
Worsted-weight acrylic remains the go-to for most crocheters—affordable, washable, and forgiving.
Red Heart Super Saver solids run about $4–$6 for a 7oz skein in late 2025, with endless colors and no dye lots to worry about.
Big Twist Value from Joann’s feels noticeably softer right off the ball, often on sale for similar prices.
For a step up in plushness, try chenille velvet yarns—they create the squishiest bunnies imaginable.
Brands like Premier Parfait or generic chenille skeins on Amazon go for $5–$9 per 100g ball, yielding ultra-huggable results.
Pastels in pink, mint, or cream fly off shelves every spring on Ravelry projects.
One friend swore by velvet for her market stall bunnies—customers couldn’t resist petting them.
Gauge, Size Guide & Must-Have Tools
Gauge isn’t super strict here, but aim for tight stitches so stuffing stays hidden—roughly 5 single crochets per inch with worsted yarn.
Using a 4mm (G) hook gives a bunny about 10–12 inches tall; drop to 3.5mm for a denser 9-inch version.
Go up to 5mm or even bulky yarn for a giant 18-inch cuddle buddy.
Clover Amour hooks top many lists in 2025 for their smooth glide through tight amigurumi stitches.
Essential tools:
- Ergonomic hook (3.75–4.5mm recommended)
- Locking stitch markers
- Blunt yarn needle
- 9–12mm safety eyes
- Small sharp scissors
Beginners often start too loose—tighten up a bit, and the shape holds perfectly.
Switching hook sizes is the easiest way to customize without rewriting the pattern.
Pattern Notes for Beginners (What You Need to Know Before Starting)
This pattern uses US crochet terms and works in continuous spirals—no joining rounds unless noted.
Place a stitch marker in the first stitch of each round; move it up as you go to avoid losing track.
Stuff firmly but not overly tight—aim for squishy, not rock-hard.
Safety eyes go in before closing the head; for babies or toddlers, embroider eyes instead to avoid choking hazards.
All pieces start with a magic ring, but if that feels fiddly, chain 2 and work into the second chain from hook.
Invisible decreases keep the shape smooth—regular decreases leave little bumps.
One crocheter skipped markers on her first bunny and ended up with an extra ear—now she swears by them.
Take breaks if your hand cramps; this project forgives pauses beautifully.
Abbreviations Explained
Here’s every abbreviation used, with quick tips for smooth sailing.
ch – chain: Yarn over, pull through loop. Simple start for many pieces.
sc – single crochet: Insert hook, yarn over, pull up loop, yarn over, pull through both. The backbone of amigurumi—keep tension even.
inc – increase: Work two single crochets in one stitch. Builds the round shape quickly.
inv dec – invisible decrease: Insert hook into front loops only of next two stitches, yarn over, pull through both, yarn over, pull through remaining loops. Reduces stitches without gaps.
sl st – slip stitch: Insert hook, yarn over, pull through stitch and loop on hook. Great for finishing or joining.
MR – magic ring: Loop yarn around fingers, work stitches into the adjustable loop—pull tight for no hole in the center.
BLO – back loop only: Work into the back loop for texture changes (used sparingly here).
Count stitches at the end of each round; it saves frogging later.
Practice the invisible decrease a few times in scrap yarn—it transforms the look.
Step-by-Step Free Crochet Bunny Pattern (Full Instructions)
Deep breath—you're about to create something truly adorable.
Work in continuous rounds unless otherwise stated.
Use your stitch marker faithfully; it keeps everything on track.
Stuff as you go, especially before closing pieces.
This classic floppy-eared bunny finishes around 10–12 inches tall with worsted yarn and a 4mm hook.
Change colors wherever you like—many crocheters add inner ear pink or a contrasting belly.
One maker skipped stuffing the ears lightly and loved the extra flop.
Head
Start with main color.
Rnd 1: 6 sc in MR (6)
Rnd 2: inc x 6 (12)
Rnd 3: (sc, inc) x 6 (18)
Rnd 4: (2 sc, inc) x 6 (24)
Rnd 5: (3 sc, inc) x 6 (30)
Rnd 6: (4 sc, inc) x 6 (36)
Rnd 7: (5 sc, inc) x 6 (42)
Rnds 8–15: sc around (42) — that's 8 rounds even
Rnd 16: (5 sc, inv dec) x 6 (36)
Rnd 17: (4 sc, inv dec) x 6 (30)
Insert safety eyes between Rnds 11 and 12, about 8 stitches apart.
Start stuffing firmly.
Rnd 18: (3 sc, inv dec) x 6 (24)
Rnd 19: (2 sc, inv dec) x 6 (18)
Rnd 20: (sc, inv dec) x 6 (12)
Rnd 21: inv dec x 6 (6)
Fasten off, weave tail through front loops to close.
Body
Main color.
Rnd 1: 6 sc in MR (6)
Rnd 2: inc x 6 (12)
Rnd 3: (sc, inc) x 6 (18)
Rnd 4: (2 sc, inc) x 6 (24)
Rnd 5: (3 sc, inc) x 6 (30)
Rnd 6: (4 sc, inc) x 6 (36)
Rnds 7–12: sc around (36) — 6 rounds
Rnd 13: (4 sc, inv dec) x 6 (30)
Rnds 14–15: sc around (30)
Rnd 16: (3 sc, inv dec) x 6 (24)
Rnds 17–18: sc around (24)
Rnd 19: (2 sc, inv dec) x 6 (18)
Fasten off, leave long tail for sewing.
Stuff firmly.
Arms (make 2)
Main color.
Rnd 1: 6 sc in MR (6)
Rnd 2: (sc, inc) x 3 (9)
Rnd 3: (2 sc, inc) x 3 (12)
Rnds 4–6: sc around (12)
Rnd 7: (2 sc, inv dec) x 3 (9)
Rnds 8–15: sc around (9) — lightly stuff lower half only
Rnd 16: inv dec x 4, sc (5)
Fasten off, close small opening, leave tail for sewing.
Legs (make 2)
Main color.
Rnd 1: 6 sc in MR (6)
Rnd 2: inc x 6 (12)
Rnd 3: (sc, inc) x 6 (18)
Rnds 4–6: sc around (18)
Rnd 7: (sc, inv dec) x 6 (12)
Rnds 8–12: sc around (12)
Stuff foot and lower leg.
Rnd 13: inv dec x 6 (6)
Fasten off, close, leave tail.
Ears (make 2)
Main color (or switch for inner color later).
Rnd 1: 6 sc in MR (6)
Rnd 2: (sc, inc) x 3 (9)
Rnd 3: (2 sc, inc) x 3 (12)
Rnd 4: (3 sc, inc) x 3 (15)
Rnd 5: (4 sc, inc) x 3 (18)
Rnds 6–14: sc around (18) — no stuffing needed for floppy ears
Rnd 15: (4 sc, inv dec) x 3 (15)
Rnd 16: (3 sc, inv dec) x 3 (12)
Rnd 17: (2 sc, inv dec) x 3 (9)
Rnds 18–20: sc around (9)
Fold flat, sc through both layers across (4-5 sc), fasten off, leave tail.
Tail
Main color.
Rnd 1: 6 sc in MR (6)
Rnd 2: inc x 6 (12)
Rnds 3–4: sc around (12)
Rnd 5: inv dec x 6 (6)
Fasten off, stuff lightly, leave tail.
Assembly and Finishing
Pin everything first—positions shift once sewn.
Sew head to body securely, adding extra stuffing at the neck if needed.
Attach arms to sides of body, just below neck.
Place legs so bunny sits nicely—usually around Rnds 4–8 of body.
Sew ears to top of head, slightly forward for that cute flop.
Add tail to lower back.
Embroider nose with pink yarn in an upside-down triangle, then a straight line down for mouth.
Add blush cheeks with pink yarn or makeup powder.
Weave in all ends.
Stand back and admire your new friend.
One crocheter's first bunny had one ear longer—now it's the signature charm.
Fun Variations and Customizations for Your Free Crochet Bunny Pattern
Switch colors mid-project for a whole new personality—try a cream body with pastel pink inner ears.
Add a simple chain bow around the neck or crochet a tiny flower to pin on.
Velvet chenille yarns create the softest, most huggable versions trending big in late 2025 markets.
Dress your bunny in removable outfits—little overalls, skirts, or even a cape turn it into a playset.
Embroider freckles, eyelashes, or a heart on the chest for extra charm.
One crocheter made a whole family in different sizes by adjusting hook and yarn weight.
Holiday twists like carrot accessories for Easter or a scarf for winter keep the pattern fresh year-round.
Common Troubleshooting and Fixes
Head wobbles? Add extra stuffing at the neck junction and sew with smaller stitches around.
Uneven shape often comes from inconsistent tension—practice a few rounds in scrap yarn first.
Stuffing shows through? Switch to a smaller hook or fuzzy yarn to hide those gaps.
Lost count mid-round? Rip back to the last known good spot—amigurumi forgives restarts.
Ears curling too much? Block them lightly with steam or pin flat while drying.
One beginner's bunny looked lopsided until she flipped the ears backward—suddenly perfect.
These hiccups happen to everyone; fixing them builds skill quietly.
Advanced Tips for Taking It Further
Try fuzzy yarn for a realistic fur effect—brush gently with a pet brush afterward.
Joint the arms and legs with buttons for posable limbs.
Add wire to ears for shaping if you want them upright sometimes.
Experiment with low-sew techniques by crocheting limbs directly onto the body.
Blend colors gradually with planned stripes or ombre yarn.
Make a giant version with blanket yarn for floor cuddle size.
Share your finished bunny on Ravelry—those project pages inspire the whole community.

The Author
I'm Joanna T. Grey. I've been designing crochet patterns for over a decade, and I focus on modern, wearable pieces with clear, tested instructions. Every pattern here is written so you actually understand the why behind each step—not just what to do. Even if you're new or experienced, you'll find practical guidance and designs that work.


