
Classic Granny Square Crochet Pattern
There's something endlessly satisfying about watching a simple chain turn into a vibrant square, round by round. The classic granny square remains a favorite because it adapts to any yarn stash, any color mood, and any skill level—perfect for cozy evenings or quick gifts.
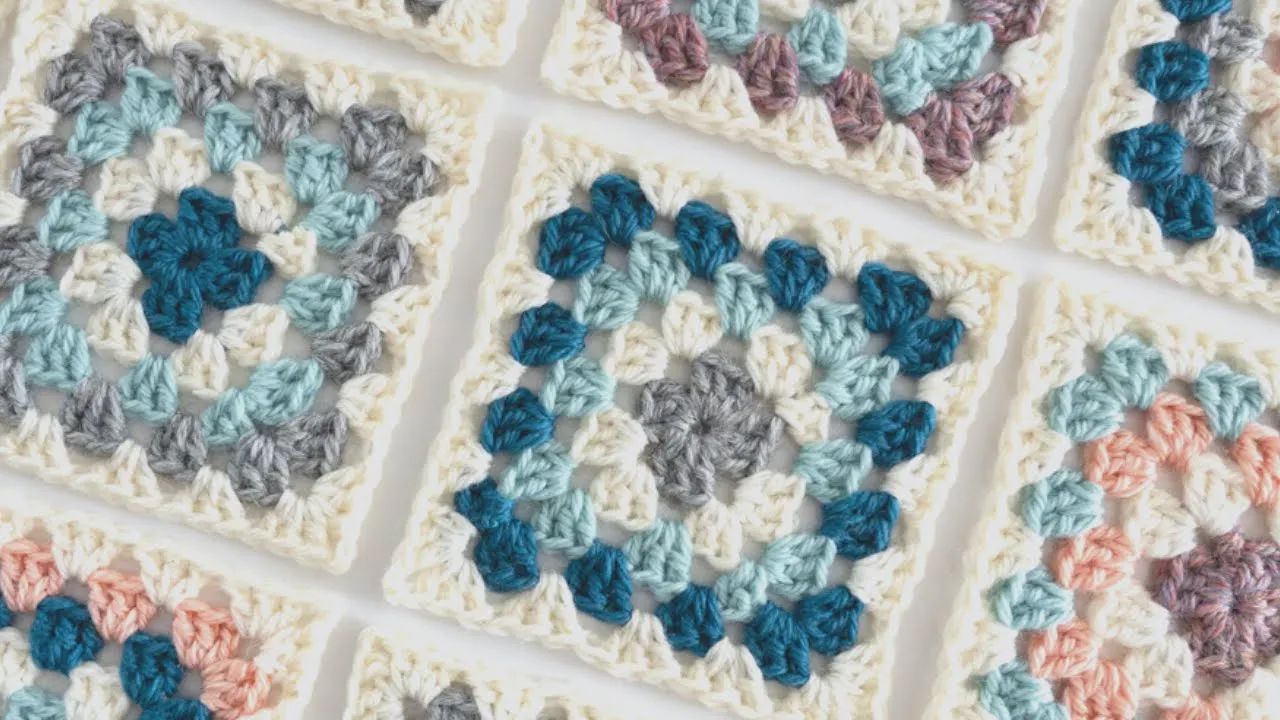
These colorful examples show why the motif never fades.
Why You'll Love the Classic Granny Square Crochet Pattern
Versatility tops the list. Join a handful for coasters, dozens for bags, or hundreds for blankets—options abound.
Color play shines here. Switch shades every round for bold rainbows or stick to neutrals for subtle elegance.
Portability makes it ideal. Tuck a small ball of yarn and hook in your bag; those waiting moments turn productive.
It's therapeutic, too. The repetitive clusters calm the mind, much like a gentle rhythm.
Worsted weight acrylic remains affordable in late 2025, with solid skeins like Red Heart Super Saver often under $5 for 364 yards at major retailers.
Many crocheters dive into charity work with grannies. Organizations like Knit-a-Square still welcome 8-inch squares in 2025 to assemble blankets for vulnerable children in South Africa.
One crocheter shared how stacking squares during a tough week built not just a lapghan but a sense of accomplishment.
Materials Needed
Gather just a few basics to dive in. A single hook, yarn in your favorite shades, and simple tools keep things uncomplicated.
Essential items include:
- Crochet hook (size H-8/5mm recommended for starters)
- Worsted weight yarn (acrylic for ease and affordability)
- Yarn needle for weaving ends
- Scissors
- Optional: stitch markers if changing colors often
That's truly all. No fancy extras required.
Many beginners start with scraps from other projects—granny squares forgive mismatched weights slightly.
One time, pulling odd balls from a donation bin led to the happiest rainbow blanket ever.
Keep supplies portable; a small notions pouch fits everything.
Best Yarn Choices for Granny Square Crochet Pattern
Worsted weight (#4) rules for classics. It offers great stitch definition, works up quickly, and holds shape beautifully.
Top beginner-friendly picks in late 2025:
- Red Heart Super Saver: America's bestseller for decades. 7oz skeins (364 yards) run about $3.77–$7 at Walmart and Michaels. Durable, machine-washable, huge color range—no dye lots for easy matching.
- Caron Simply Soft: Silky sheen, super soft feel. 6oz skeins (315 yards) around $5–$8. Glides effortlessly, perfect for wearables or cuddly blankets.
- Red Heart All in One Granny Square: Self-striping magic—changes colors automatically. One 8.8oz ball (417 yards) makes up to 14 squares with fewer ends to weave.
Acrylic dominates recommendations because it's forgiving: doesn't split easily, washes forever, budget-kind.
Cotton alternatives like Paintbox Yarns Cotton Aran provide crisp definition but cost more and feel stiffer—save for summer items.
Avoid fuzzy or heavily textured yarns at first; they hide stitches and frustrate counting.
These colorful worsted skeins show the vibrant options available right now.
Charity groups often specify acrylic for longevity—check guidelines if donating.
Gauge, Size Guide & Must-Have Tools
Gauge matters less for single squares but becomes crucial when joining many. Standard classic with worsted yarn and H-8 hook: 4 rounds ≈ 4–4.5 inches.
Quick size guide (US terms, worsted yarn):
- 3 rounds: ~3 inches (coasters)
- 5 rounds: ~6 inches (bags, pillows)
- 7–8 rounds: ~8–9 inches (charity blankets like Knit-a-Square)
Switch to G-6 hook for tighter ~3.5-inch squares; J-10 for looser ~5.5-inch ones. Experiment on swatches.
Must-have tools beyond hook and yarn:
- Ergonomic hooks reduce hand strain—Clover Amour sets top 2025 beginner lists for cushy grips.
- Blunt yarn needle (size 16–18) for seamless joining.
- Measuring tape to check progress.
Basic aluminum hooks work fine initially, but upgrading to ergonomic makes longer sessions joyful.
Trouble with curling corners? Go up a hook size—common fix that saves frogging.
Your first squares might vary; embrace the charm. Consistency improves naturally.
Comfortable ergonomic hooks like these make all the difference.
And here's how sizes scale up—perfect reference for planning projects.
Pattern Notes & Tips Before You Start
Starting strong sets the tone for the whole project. These notes cover everything needed to make the classic granny square smooth and enjoyable.
Work in US crochet terms throughout—no surprises there.
The pattern uses rounds, not rows, so turn the work only if specified (traditional grannies often don't).
Begin with a magic ring for a tight center; alternatives include ch 4 and join with sl st to form a ring if the magic ring feels tricky at first.
These step-by-step magic ring photos help visualize the start perfectly.
Count stitches carefully in early rounds—easy to add extras accidentally.
Corners form with (3 dc, ch 2, 3 dc) in the same space; sides use 3 dc clusters separated by ch 1.
Change colors at the end of a round for clean joins: complete the last stitch with the new color.
Weave ends as you go to avoid a pile later—saves sanity.
Common beginner hiccups and fixes:
- Square slanting or twisting? Turn work each round or keep consistent direction.
- Center hole too big? Pull magic ring tighter or use fewer starting chains.
- Edges curling? Relax tension or go up a hook size.
Safety first: keep hooks away from little ones, and take breaks if hands ache—ergonomic hooks help immensely.
One early square went wonky from inconsistent tension, but blocking fixed it beautifully. Yours will improve quickly.
Abbreviations Explained
Patterns rely on abbreviations to stay concise. Here's every one used in the classic granny square, defined clearly with tips for smooth stitching.
ch – chain
Form the foundation. Yarn over, pull through loop. Tip: Keep chains loose to avoid tight starts.
sl st – slip stitch
Insert hook, yarn over, pull through both loops. Tip: Use for invisible joins or moving without adding height.
dc – double crochet
Yarn over, insert hook, yarn over pull up, yarn over pull through two, yarn over pull through two. Tip: Tallest stitch here—gives the classic height.
These clear abbreviation charts serve as handy references.
sp – space
The gap created by chains—work into these for lacy look.
rnd – round
One complete circle around the piece.
rep – repeat
Follow starred instructions as directed.
() – work stitches in same place
Essential for clusters and corners.
** – repeat instructions between asterisks
Common in granny patterns for symmetry.
ch-sp – chain space
The specific opening under chains—clusters go here on later rounds.
Practice each abbreviation on a small swatch first if new. They click fast.
Trouble remembering? Print a chart or bookmark one—most crocheters keep a quick reference nearby.
These cover everything for the pattern ahead. Ready to chain up?
Spotting common issues early, like these examples, prevents frustration down the line.
And here's how rounds build visually—great for following along.
Step-by-Step Instructions
Ready to hook up your first square? This classic version uses the traditional cluster style—timeless and straightforward.
Work with worsted yarn and an H-8 (5mm) hook for a standard size. Change colors each round or keep it solid; both look fabulous.
Follow along round by round. Stitch counts appear at the end of each for easy checking.
Breathe easy—everyone's first square looks a bit quirky. By the third, magic happens.
Round 1: Starting the Center
Make a magic ring (or ch 4, join with sl st to form ring).
Ch 3 (counts as first dc), 2 dc in ring, ch 2, (3 dc in ring, ch 2) 3 times.
Join with sl st to top of beginning ch-3.
Pull magic ring tight. Fasten off if changing color.
Stitch count: 12 dc (four 3-dc clusters), 4 ch-2 corner spaces.
These close-ups show Round 1 perfectly formed.
Round 2: Building the Corners
Join new color (or continue) with sl st in any ch-2 corner space.
Ch 3 (counts as dc), 2 dc, ch 2, 3 dc in same corner space—first corner made.
(Ch 1, (3 dc, ch 2, 3 dc) in next ch-2 space) 3 times.
Ch 1, join with sl st to top of beginning ch-3.
Stitch count: 24 dc (eight 3-dc clusters), 4 ch-2 corners, 4 ch-1 side spaces.
Notice how the square shape emerges already.
Round 3: Growing the Sides
Join in any corner ch-2 space.
Ch 3, 2 dc, ch 2, 3 dc in same space.
Ch 1, 3 dc in next ch-1 space, ch 1, (3 dc, ch 2, 3 dc) in next corner space; repeat from around.
Ch 1, join with sl st to top of ch-3.
Stitch count: 36 dc (twelve 3-dc clusters), 4 ch-2 corners, 8 ch-1 spaces.
Keep those corners generous—extra chains there create the classic open look.
Round 4 and Beyond: Repeating the Pattern
All further rounds follow the same logic.
Join in corner, (3 dc, ch 2, 3 dc) in each corner space.
Work 3 dc in every ch-1 space along sides, separated by ch 1.
End each round with ch 1, sl st join.
Each new round adds one more 3-dc cluster per side.
Stop when your square reaches desired size—5 rounds for about 6 inches, 7 for 8–9 inches.
Fasten off and weave in ends securely.
Beautiful completed classics in all their colorful glory.
Assembly and Finishing
Make as many squares as your project needs—coasters take 1, pillows 4–9, blankets hundreds.
Popular joining methods:
- Whip stitch (sewing): Place squares right sides together, sew through back loops only with yarn needle for flat seam.
- Slip stitch join: Hold wrong sides together, sl st through back loops—quick and textured.
- Single crochet join: Creates decorative ridge; great for visible seams.
Lay out squares first to balance colors.
Weave in all ends before joining.
Blocking makes everything crisp: Pin squares to size on foam mats, lightly steam or spritz with water, let dry completely.
That first blocked square revealed sharp corners and even stitches—total game-changer.
These joining techniques side by side—choose what suits your style.
And look at the difference blocking makes.
Your squares are ready to become something wonderful. Enjoy every stitch.
Easy Variations & Custom Ideas
Switching up the classic opens endless doors. These beginner-friendly tweaks add flair without complicating things.
Solid granny square: Skip chain spaces between clusters for dense fabric—ideal for bags or warm blankets.
These seamless solids showcase the modern dense look trending in 2025.
Sunburst version: Start with puff or cluster stitches for a circular burst, then square off with classic rounds—sunflower effects remain huge this year.
Floral centers: Add layered petals in early rounds before transitioning to granny clusters. Daisy or rose motifs pop in current designs.
Flower grannies like these dominate 2025 patterns for their cheerful vibe.
Mix textures: incorporate bobbles, front-post stitches, or spikes for dimension.
Color ideas: earthy Mocha Mousse tones blend with neon pops, or try ombré self-striping yarns for effortless gradients.
One variation turned a simple solid into a sturdy market bag that holds everything beautifully.
Common Troubleshooting and Fixes
Issues crop up, but fixes exist—most resolve easily.
Curling edges: Often from tight tension or too few increases. Go up a hook size or add extra chains in corners.
Before-and-after shots like these highlight how blocking flattens curls perfectly.
Slanting or twisting square: Double crochet naturally leans—turn work each round to counter it.
Wavy or ruffled sides: Too many stitches; reduce side chains to ch 1 consistently.
Wonky shape overall: Count clusters carefully—each side adds one more per round. Blocking evens most inconsistencies.
Center gap too large: Pull magic ring tighter or start with fewer chains.
Steam blocking transforms many "failures" into flawless pieces.
That wonky first batch became perfect potholders after a quick block—no waste here.
Next-Level Tips
Elevate squares once basics click.
Join-as-you-go (JAYG): Connect during the final round—saves sewing time and creates seamless blankets.
This method streamlines large projects beautifully.
Continuous granny: Work one giant square outward—no joining hundreds of motifs.
Continuous versions suit quick throws or growing blankets.
Start new colors in different corners to hide joins better.
Carry yarn up sides for fewer ends in multi-color work.
Block aggressively for crisp edges—pin and steam acrylics lightly.
Experiment with hexagon grannies for variety; they tessellate uniquely.
Sunburst hybrids like these add drama to any project.
These tips turn good squares into stunning ones—keep hooking.

The Author
I'm Joanna T. Grey. I've been designing crochet patterns for over a decade, and I focus on modern, wearable pieces with clear, tested instructions. Every pattern here is written so you actually understand the why behind each step—not just what to do. Even if you're new or experienced, you'll find practical guidance and designs that work.


