
Cozy Crochet Pullover Sweater: Free Pattern
Nothing beats slipping into a handmade pullover that feels like a hug on a chilly day.
This classic design uses simple stitches to create something timeless and wearable, perfect for layering or lounging.
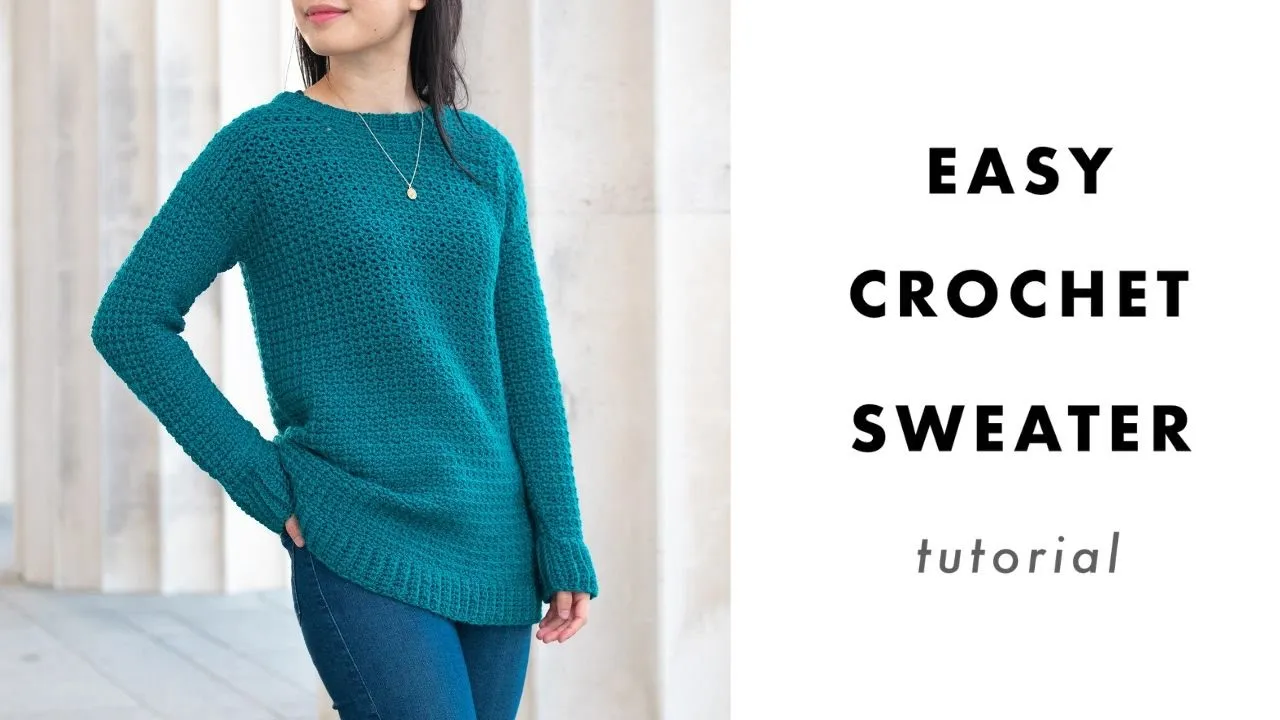
Why You'll Love This Crochet Pullover Sweater
Pullovers like this one top the charts on Ravelry right now, with patterns such as The Simple Everyday Crochet Sweater racking up thousands of projects in late 2025 alone. Makers adore the relaxed fit and customizable length.
Worsted weight yarn keeps things affordable—expect to spend around $20-30 for enough acrylic or wool blend for an adult size, based on current online prices for brands like Caron or Red Heart.
Texture trends in 2025 lean toward puff stitches and subtle ribbing, adding just enough interest without overwhelming the flow.
One crocheter shared how her first pullover became her go-to for coffee runs; after a few wears, it softened beautifully and drew compliments everywhere.
Materials Needed
Gathering supplies feels exciting when everything stays within reach and budget. This pullover calls for about 900–1500 yards of worsted weight yarn, depending on size.
Expect 5–8 skeins for most adult versions. Current prices in late 2025 keep solid acrylic options affordable.
Essential items include:
- Crochet hook (size 5.5mm or 6mm recommended)
- Yarn needle for weaving ends
- Stitch markers
- Measuring tape
- Scissors
A few blocking mats and pins help shape the final piece beautifully.
One time, skipping the yarn needle led to frantic searching mid-seaming—lesson learned.
These basics total under $30 if shopping sales at big craft stores.
Best Yarn Choices for Crochet Pullover Sweater
Worsted weight shines for sweaters because it drapes well without stiffness. Acrylic blends dominate beginner projects on Ravelry this year.
Caron Simply Soft remains a favorite—its sheen and softness make stitches glide smoothly. A 6oz skein runs around $5–7 online right now.
Red Heart Super Saver offers durability at even lower cost, often $4–6 per large skein, though it feels slightly firmer until washed.
Lion Brand Heartland adds subtle tweed flecks and premium acrylic feel, priced near $7–8, with gorgeous neutral tones trending in 2025 projects.
For a touch of warmth, Lion Brand Touch of Alpaca Bonus Bundle (acrylic-alpaca blend) pops up in many new pullover makes, around $10–12 per bundle.
Machine-washable options like these forgive newbie mistakes and hold up to daily wear.
Swatching with your chosen yarn reveals the perfect drape—totally worth the few minutes.
Beginners often start with acrylic for forgiveness; it doesn't split easily in affordable lines and softens after blocking.
Gauge, Size Guide & Must-Have Tools
Gauge matters most here—aim for 14 half double crochets and 10 rows in 4x4 inches with worsted yarn and 5.5mm hook.
Slight variations adjust easily in this relaxed-fit design.
Sizes range from XS to 5XL, with positive ease built in for comfort. Measure bust, then add 4–6 inches for oversized vibe.
To tweak: go up a hook size for looser drape or down for snugger fit.
Must-have tools beyond basics:
- Ergonomic hooks (Clover Amour sets stay popular)
- Flexible measuring tape for checking as you go
Stitch markers prevent counting errors during yoke increases.
Blocking wires aren't essential but transform the finished look.
Many crocheters finish their first sweater a size larger than planned—embrace it as cozy bonus room.
Adjust length by adding or subtracting body rows before ribbing.
Trust the process, measure often, and soon you'll have a custom-fit treasure.
Pattern Notes & Tips Before You Start
This pullover works top-down in seamless rounds, eliminating most seaming and keeping momentum high.
Half double crochet forms the main fabric, offering stretch and drape that's forgiving for first-time garment makers.
Turning chains count as stitches in ribbing sections only—watch notes carefully to avoid extra bulk.
Place stitch markers at four key points for raglan increases; move them up each round to stay on track.
Counting stitches every few rounds prevents surprises later. A quick tally takes seconds and saves hours of frogging.
Work loosely in the yoke for better armhole ease—tight tension here can make sleeves snug.
If your gauge runs loose, drop to a 5mm hook; if tight, go up to 6mm.
Blocking evens everything out beautifully, so don't skip it.
One crocheter once ignored markers and ended up with uneven sleeves—now she swears by bright contrasting ones.
Safety first: keep hooks away from pets and kids, and take breaks to avoid hand strain.
Abbreviations Explained
All terms follow standard US crochet conventions. Here's every one used, with clear explanations and tips.
ch – chain: Yarn over, pull through loop. Forms foundation rows or spaces. Keep even tension—too tight makes starting rows hard.
sl st – slip stitch: Insert hook, yarn over, pull through both loops. Joins rounds seamlessly or moves yarn without height. Use loosely in joins to avoid puckering.
sc – single crochet: Insert hook, yarn over pull up loop, yarn over pull through both. Appears in ribbing for stretch. Work into back loops for textured cuffs.
hdc – half double crochet: Yarn over, insert hook, yarn over pull up loop, yarn over pull through all three. Main stitch here—gives soft drape and works up quickly.
inc – increase: Work two stitches in one. For yoke, usually two hdc in marked stitch. Place marker in first of the pair to track.
PM – place marker: Slide a locking marker into stitch. Essential for raglan lines—removable ones clip on easily.
rep – repeat: Follow instructions in asterisks or parentheses.
rnd – round: Continuous spiral or joined circle.
st(s) – stitch(es): The loops on your hook or fabric.
These basics build the whole sweater. Practice each in a small swatch first if needed—confidence grows fast.
Step-by-Step Crochet Pullover Sweater Pattern
This seamless top-down raglan design builds confidence with every round. Work in continuous spirals where noted, or join with slip stitches—whichever keeps your tension even.
Stitch counts appear at the end of each round in parentheses. Sizes: XS (S, M, L, XL, 2XL, 3XL, 4XL, 5XL). Finished bust: 34 (38, 42, 46, 50, 54, 58, 62, 66) inches with 4–6 inches positive ease.
Yoke
Start with the neckline foundation.
Rnd 1: Ch 72 (80, 88, 96, 104, 112, 120, 128, 136), join with sl st to form ring (careful not to twist). Ch 2 (does not count as st here and throughout yoke), hdc in each ch around. Join with sl st to first hdc. (72, 80, 88, 96, 104, 112, 120, 128, 136 sts)
Rnd 2: Ch 2, hdc in first 10 (12, 14, 16, 18, 20, 22, 24, 26) sts (front), PM in next st, (2 hdc in next st) twice (raglan inc), PM in second inc, hdc in next 14 (16, 18, 20, 22, 24, 26, 28, 30) sts (sleeve), PM in next st, (2 hdc in next st) twice, PM in second inc, hdc in next 20 (22, 24, 26, 28, 30, 32, 34, 36) sts (back), PM in next st, (2 hdc in next st) twice, PM in second inc, hdc in next 14 (16, 18, 20, 22, 24, 26, 28, 30) sts (sleeve), PM in next st, (2 hdc in next st) twice, hdc in remaining 10 (10, 10, 10, 10, 10, 10, 10, 10) sts to join. Join. (80, 88, 96, 104, 112, 120, 128, 136, 144 sts)
Rnd 3 and beyond: Ch 2, hdc in each st to marker, 2 hdc in marked st, sl marker to new second st, 2 hdc in next st (4 inc per raglan), hdc to next marker; rep from 3 times, hdc to end. Join. (8 sts increased each rnd)
Repeat this increase round until yoke measures approximately 8 (8.5, 9, 10, 11, 12, 13, 14, 15) inches from neck edge or reaches underarm fit when tried on. Typical total sts at separation: 200 (224, 248, 272, 296, 320, 344, 368, 392) sts.
Body
Separate sleeves here—no chains needed for underarm in this fitted version.
Separation Rnd: Ch 2, hdc across front to first raglan marker, skip sleeve sts (place on holder or waste yarn), hdc across back to next raglan marker, skip second sleeve sts, hdc in remaining sts to join. Join and continue in rnds. Sleeve sts skipped: 46 (52, 58, 64, 70, 76, 82, 88, 94) each side.
Body sts now: 108 (120, 132, 144, 156, 168, 180, 192, 204) sts.
Work even in hdc until body measures 16 (16, 17, 17, 18, 18, 19, 19, 20) inches from underarm or desired length to ribbing.
Many makers add a few extra rounds for cropped or longer fits—measure against yourself.
Sleeves (Make 2)
Rejoin yarn at underarm center.
Rnd 1: Ch 2, hdc evenly around sleeve opening, picking up 2–4 sts underarm if needed for smooth join. Aim for 48 (54, 60, 66, 72, 78, 84, 90, 96) sts total. Join.
Decrease gradually for taper: Every 5th rnd, work 2 hdc decreases evenly spaced (hdc2tog).
Continue until sleeve measures 16 (16.5, 17, 17.5, 18, 18, 18.5, 19, 19) inches from underarm or desired length.
Final rnd before cuff: Reduce to 36 (40, 44, 48, 52, 56, 60, 64, 68) sts if needed.
Assembly and Finishing
Ribbing (Neck, Cuffs, Hem)
Work in rows for stretch.
For cuffs: Ch 9 (11 for wider). Sc in 2nd ch from hook and across (8, 10 sc).
Row 1: Sc in blo across, sl st to attach to sleeve edge in 2 sts.
Row 2: Ch 1, sc in blo across, turn.
Repeat until ribbing fits snugly around. Seam ends.
Repeat for second cuff and hem (ch 11–13 for hem).
Neck ribbing: Pick up evenly around neck edge (about 72 sts), work similar ribbing rows, 2–3 inches tall.
Weave in ends securely. Block gently—wet block acrylic blends or steam block wools for perfect drape.
Once dry, slip it on and feel that handmade magic.
Adjustments come easily next time—longer sleeves, shorter body, whatever suits you. Enjoy every stitch.
Easy Variations & Custom Ideas
Switching colors mid-project opens endless doors. Color blocking ranks high on Ravelry projects this winter, with bold sections in contrasting shades.
Stripes on sleeves add playfulness without complicating the yoke—many 2025 makes feature narrow bands every few rounds.
Texture pops with puff or bobble stitches scattered across the body or sleeves, echoing runway trends toward dimension.
Crop the body by stopping 4–6 inches sooner, or lengthen for tunic style. Wider necklines come from fewer foundation chains.
Oversized fits shine—add extra increases in the yoke for slouchy comfort.
One maker turned leftovers into subtle fade stripes; the result softened beautifully after washing.
These tweaks keep the pattern simple while making it uniquely yours.
Common Troubleshooting and Fixes
Uneven yokes happen often—usually from inconsistent tension or missed increases on one side.
Count stitches after every increase round. If off, frog back to the last correct round and redo.
Curving fabric signals tighter tension on one half—relax your grip or switch hands briefly.
Sleeves too tight? Add extra rounds before separation or pick up more underarm stitches.
Gaping necklines fix with shorter foundation chains next time, or crochet a few decrease rounds post-yoke.
Puckering at joins means loose slip stitches—pull snug but not tight.
Blocking transforms most issues: wet or steam the piece, pin to measurements, and let dry flat.
Small mistakes fade after a wash and wear. Progress, not perfection, matters here.
Next-Level Tips
Try holding two strands together for chunkier drape, mimicking 2025's cozy oversized looks.
Incorporate short rows in the back yoke for better shoulder fit—add them just before separation.
Switch to front and back post ribbing for professional edges that hug without curling.
Experiment with gradient cakes; Caron Cakes still trend for seamless color shifts, though prices hover around $10–12 per ball lately.
Steam blocking over wet works wonders on acrylic blends, setting stitches without full soak.
Track projects on Ravelry—thousands log similar pullovers monthly, offering real-time inspiration.
Measure as you go, especially underarms; trying on mid-process catches fit issues early.
Your second sweater always turns out even better. Keep notes, celebrate the finish, and wear it often.

The Author
I'm Joanna T. Grey. I've been designing crochet patterns for over a decade, and I focus on modern, wearable pieces with clear, tested instructions. Every pattern here is written so you actually understand the why behind each step—not just what to do. Even if you're new or experienced, you'll find practical guidance and designs that work.


