
Free Easy Granny Square Crochet Blanket Pattern
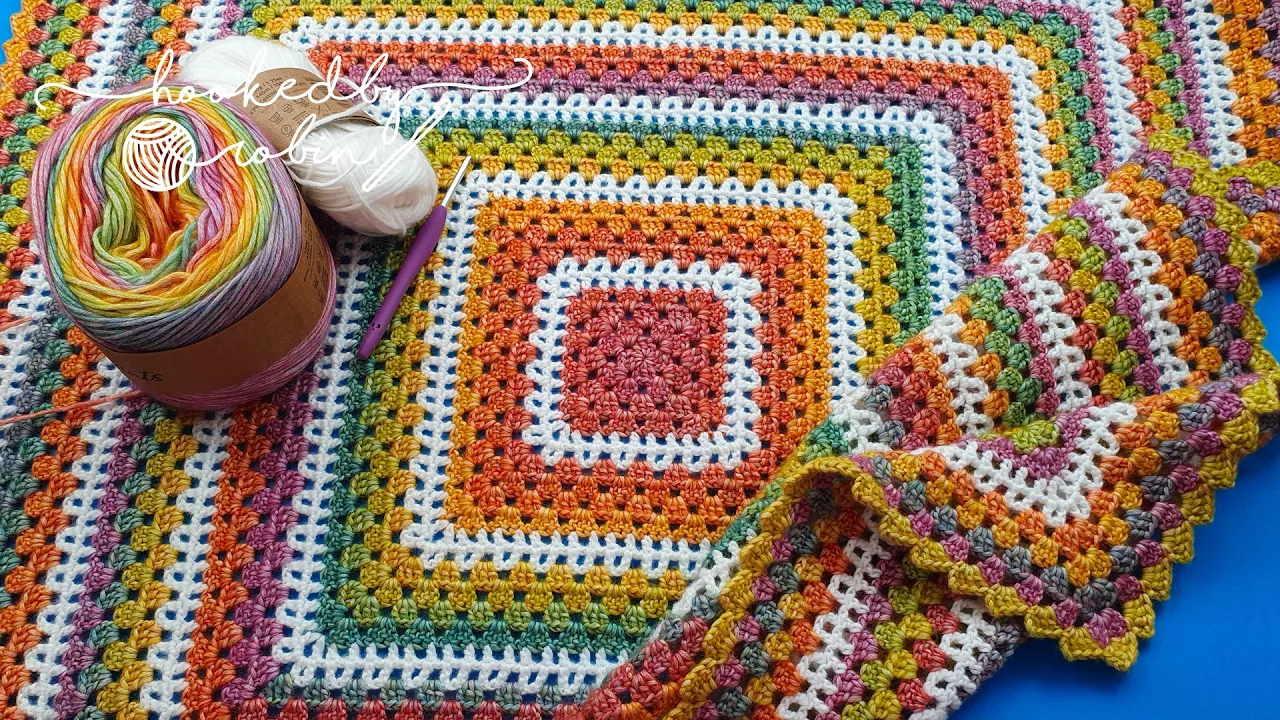
The easy granny square crochet blanket pattern is a project consisting of individual square motifs joined together to create a cohesive throw. I love this specific version because it allows you to use up every scrap of yarn in your basket while making progress in small, manageable chunks.
You can finish one square during a single episode of your favorite show, providing that "quick win" feeling I always rave about.
My inspiration for this design comes from the vintage "scrapghans" found in coastal cottages and my grandmother's living room. I wanted to create a version that feels modern but keeps that nostalgic, eclectic soul. Using a mix of leftover wool and acrylic blends from my stash makes each blanket a one-of-a-kind piece of functional art.
Why Is This Crochet Blanket Pattern A Classic?
This crochet blanket pattern is a classic because the granny square has remained the most recognizable symbol of crochet since the 1890s. Its enduring popularity stems from its modular nature and the mathematical simplicity of the stitches.
You are essentially creating a fabric that is breathable yet warm, making it a staple in homes for over a century.
The geometry of the granny square allows for endless color experimentation. You can change colors every round to highlight the "cluster" stitches or keep it a solid neutral for a contemporary look. This versatility ensures the design never goes out of style, regardless of current interior design trends.
Is This Crochet Blanket Pattern Hard For Beginners?
The crochet blanket pattern featured here is not hard; it is actually one of the most beginner-friendly projects you can choose.
You only need to master the double crochet stitch and the chain stitch to complete the entire piece. I promise that once you get the rhythm of the "three-double-crochet cluster," your hands will practically move on autopilot.
- Mistakes are easy to fix: If you miss a stitch, you only have to undo a small section of one square rather than a whole row of a massive blanket.
- No long starting chains: You start in the center with a tiny ring, so you don't have to worry about your tension ruining a foundation chain of 200 stitches.
- Portable progress: You can carry a few squares in your bag and work on them anywhere without lugging around a heavy, half-finished quilt.
Don't let the fear of "perfect tension" stop you from starting today. Even if your first few squares look a little wonky, they will blend perfectly once we join them all together.
Materials For Your Easy Crochet Blanket Pattern
Materials for your easy crochet blanket pattern include a size H/8 (5.0mm) crochet hook and approximately 2,000 yards of medium-weight (category 4) yarn for a standard throw.
I prefer using acrylic or cotton blends because they provide great stitch definition and stand up well to frequent washing. You will also need a pair of sharp scissors and a blunt tapestry needle to weave in your ends as you finish each square.

Standard Abbreviations For This Crochet Blanket Pattern
Standard abbreviations for this crochet blanket pattern follow US terminology to ensure clarity for beginners and experienced makers alike. I have listed the specific stitches used in this project below to help you keep track of your work.
- ch: Chain
- st: Stitch
- sl st: Slip stitch
- dc: Double crochet
- sp: Space
- lp: Loop
Step-By-Step Granny Square Instructions
Step-by-step granny square instructions begin with creating a center ring to anchor your first round of stitches. I use the chain-4 method because it is secure and easy for beginners to see where to insert the hook.
Do not worry if your center hole looks slightly large at first; it will tighten up as you add more rounds.
Foundational Ring: Ch 4. Join with a sl st to the first ch to form a ring.
Round 1: Ch 3 (counts as first dc here and throughout). Work 2 dc into the ring. Ch 2. Work 3 dc into the ring, ch 2. Repeat from to 2 more times. Join with a sl st to the top of the starting ch-3.
- Stitch Count: 4 clusters of 3-dc and 4 ch-2 corner spaces.
Round 2: Sl st in the next 2 dc and into the corner ch-2 sp. Ch 3, 2 dc, ch 2, 3 dc in the same corner sp. Ch 1. In the next corner ch-2 sp, work 3 dc, ch 2, 3 dc. Ch 1. Repeat from to 2 more times. Join with a sl st to the top of the starting ch-3.
- Stitch Count: 8 clusters of 3-dc, 4 ch-2 corner spaces, and 4 ch-1 side spaces.
Round 3: Sl st in the next 2 dc and into the corner ch-2 sp. Ch 3, 2 dc, ch 2, 3 dc in the same corner sp. Ch 1. Work 3 dc in the next ch-1 sp. Ch 1. In the next corner ch-2 sp, work 3 dc, ch 2, 3 dc. Ch 1. Work 3 dc in the next ch-1 sp. Ch 1. Repeat from to 2 more times. Join with a sl st to the top of the starting ch-3.
- Stitch Count: 12 clusters of 3-dc, 4 ch-2 corner spaces, and 8 ch-1 side spaces.
Round 4: Sl st in the next 2 dc and into the corner ch-2 sp. Ch 3, 2 dc, ch 2, 3 dc in the same corner sp. Ch 1. Work 3 dc in the next ch-1 sp, ch 1 twice. In the next corner ch-2 sp, work 3 dc, ch 2, 3 dc. Ch 1. (Work 3 dc in the next ch-1 sp, ch 1) twice. Repeat from to 2 more times. Join with a sl st to the top of the starting ch-3.
- Stitch Count: 16 clusters of 3-dc, 4 ch-2 corner spaces, and 12 ch-1 side spaces.
Stitch Count Reference Table
The stitch count reference table helps you verify that your square is growing correctly after each round. I recommend counting your clusters every few minutes to ensure you haven't skipped a side space.
| Round | Number of 3-dc Clusters | Total Double Crochet Stitches | Corner Ch-2 Spaces |
|---|---|---|---|
| 1 | 4 | 12 | 4 |
| 2 | 8 | 24 | 4 |
| 3 | 12 | 36 | 4 |
| 4 | 16 | 48 | 4 |
| 5 | 20 | 60 | 4 |
Pro Tip: I always weave in my yarn tails after finishing every three squares. If you wait until the very end of the blanket to weave in 50 sets of ends, it feels like a chore rather than a hobby!
Assembly Of The Crochet Blanket Pattern
Assembly of the crochet blanket pattern involves joining your finished squares using a join-as-you-go method or a simple mattress stitch.
I suggest making 42 squares (6 squares wide by 7 squares long) for a comfortable lap-sized throw.
This size is perfect for stash-busting because you can make each square a different color while using a single solid color for the final border to tie the look together.
The Invisible Join For Crochet Squares
The invisible join technique is a sewing method used to connect crochet motifs by weaving a tapestry needle through the back loops of the stitches to create a flat, seamless surface.
I prefer this method because it eliminates the raised ridges often created by slip-stitch joins, making your blanket look professionally finished.
To execute this, you align two squares with the right sides facing up and whip-stitch through the back loops only, ensuring you do not pull the yarn so tight that the fabric puckers.
This technique is incredibly forgiving if your stitch counts are off by one or two between squares. You can simply skip a stitch or work twice into one loop to realign the corners, and the join remains hidden within the texture of the yarn.
I always use a long strand of the same yarn used for the final round of the squares to ensure the "seam" is entirely undetectable to the naked eye.
Best Yarn For This Crochet Blanket Pattern
Red Heart Super Saver is the specific yarn I recommend for this crochet blanket pattern because it is a 100% acrylic, worsted-weight yarn that is both affordable and widely available in over 100 colors.
I love this yarn for "stash-busting" because it is a "no-dye-lot" yarn, meaning if you run out of a specific color mid-project, you can buy another skein and the shade will match perfectly.
This yarn is excellent for beginners because the plies are tightly twisted, which prevents the yarn from splitting while you are learning to manage your hook. It is also exceptionally durable and becomes significantly softer after a single cycle through a washing machine and dryer. Because it is an inexpensive "workhorse" yarn, you can practice your stitches without the stress of wasting high-cost luxury fibers.
Essential Tools For Your Crochet Project
Tools for your crochet project include an ergonomic H/8 (5.0mm) aluminum hook, a set of blunt-tipped steel tapestry needles, and a pair of sharp embroidery scissors.
I recommend using an ergonomic hook with a rubberized grip to prevent hand cramping during long sessions of making squares.
The steel tapestry needles are necessary for the invisible join and for weaving in your "tails" securely so your blanket doesn't unravel in the wash.
Gauge And Sizing For The Granny Square
Gauge for this crochet blanket pattern is approximately 12 double crochet stitches and 6 rows to measure 4 inches (10 cm).
In this specific project, your individual square should measure 5 inches by 5 inches after completing four rounds. I encourage you not to stress if your gauge is slightly off; as long as all your squares are the same size, the blanket will assemble perfectly.
Finished Blanket Dimensions
Finished blanket dimensions for a standard lap throw using a 6x7 grid (42 squares total) are approximately 35 inches by 42 inches.
This size is ideal for a "quick win" because it is large enough to be functional but small enough to finish in a few weeks.
You can easily expand this to a full-sized bedspread by increasing your square count to a 10x12 grid, which would result in a 55-inch by 65-inch blanket including a simple border.
Pattern Notes For The Easy Granny Square
Pattern notes for the easy granny square include the fact that this is a modular design with no specific stitch multiple required for the starting chain.
Unlike blankets worked in long rows, you start each square from the center and work outward in rounds.
This means you do not need to calculate a foundation chain "multiple plus two" to adjust the size; you simply add or subtract the total number of finished squares to reach your desired dimensions.
The starting "chain 3" at the beginning of every round counts as one double crochet stitch. I recommend placing a stitch marker in the top of this chain so you know exactly where to insert your hook when you finish the round. If you skip this step, your square might become lopsided because the final slip stitch was placed in the wrong spot.
Changing colors occurs at the start of a new round by fastening off the old yarn and joining the new color in any corner space. I find this method easier for beginners than changing colors mid-row because it provides a clean, sturdy starting point for your new yarn.
If you prefer a solid color blanket, you can continue with the same strand by slip-stitching your way to the nearest corner as described in the tutorial.
Corner spaces always consist of two chain stitches to create a sharp 90-degree angle. Side spaces between the three-dc clusters only require one chain stitch to keep the fabric from becoming too loose or floppy. Keeping this 2-1 ratio consistent is the secret to a perfectly square motif that lies flat on your table.
Common Abbreviations In This Crochet Pattern
Common abbreviations in this crochet pattern are standardized US terms used to simplify the written instructions for the maker. I have compiled this list to help you decode the steps without having to look up terms elsewhere.
- ch (chain): Wrap the yarn over the hook and pull a loop through the loop already on your hook.
- dc (double crochet): Yarn over, insert hook into the stitch, yarn over and pull up a loop, yarn over and pull through two loops, yarn over and pull through the remaining two loops.
- lp (loop): The strand of yarn currently sitting on your crochet hook or the specific part of a stitch you are working into.
- sl st (slip stitch): Insert hook into the stitch, yarn over, and pull the yarn through both the stitch and the loop on your hook in one movement.
- sp (space): The gap created by a chain stitch in the previous round, where you will insert your hook instead of into the top of a stitch.
- st (stitch): A single completed unit of crochet work.
Share your finished crochet blanket by posting photos on social media or emailing them directly to me.
I truly love seeing the unique color combinations you choose from your yarn stash, as every blanket tells a different story. Do not worry if your stitches are not perfect or if your squares are slightly different sizes; once the blanket is washed and blocked, those small details disappear into the overall texture.
I am here to support your crafting journey and celebrate your progress with every square you finish. Seeing your progress photos helps other beginners feel confident enough to pick up a hook for the first time. Your work is a real accomplishment, and you deserve to show off the cozy masterpiece you created with your own two hands.

The Author
I'm Joanna T. Grey. I've been designing crochet patterns for over a decade, and I focus on modern, wearable pieces with clear, tested instructions. Every pattern here is written so you actually understand the why behind each step—not just what to do. Even if you're new or experienced, you'll find practical guidance and designs that work.


