
Free Easy Amigurumi Cat Crochet Pattern
I just finished whipping up the cutest little amigurumi cat using scraps from my stash, and I have to share it with you right now.
This cat crochet pattern creates a sweet stuffed kitty toy that works up in about an hour – perfect for that quick win we all crave.
I chose the simple rounded amigurumi style from popular free patterns like Lily the Cat or similar no-fuss designs. It's mostly single crochet in the round with basic increases and decreases.
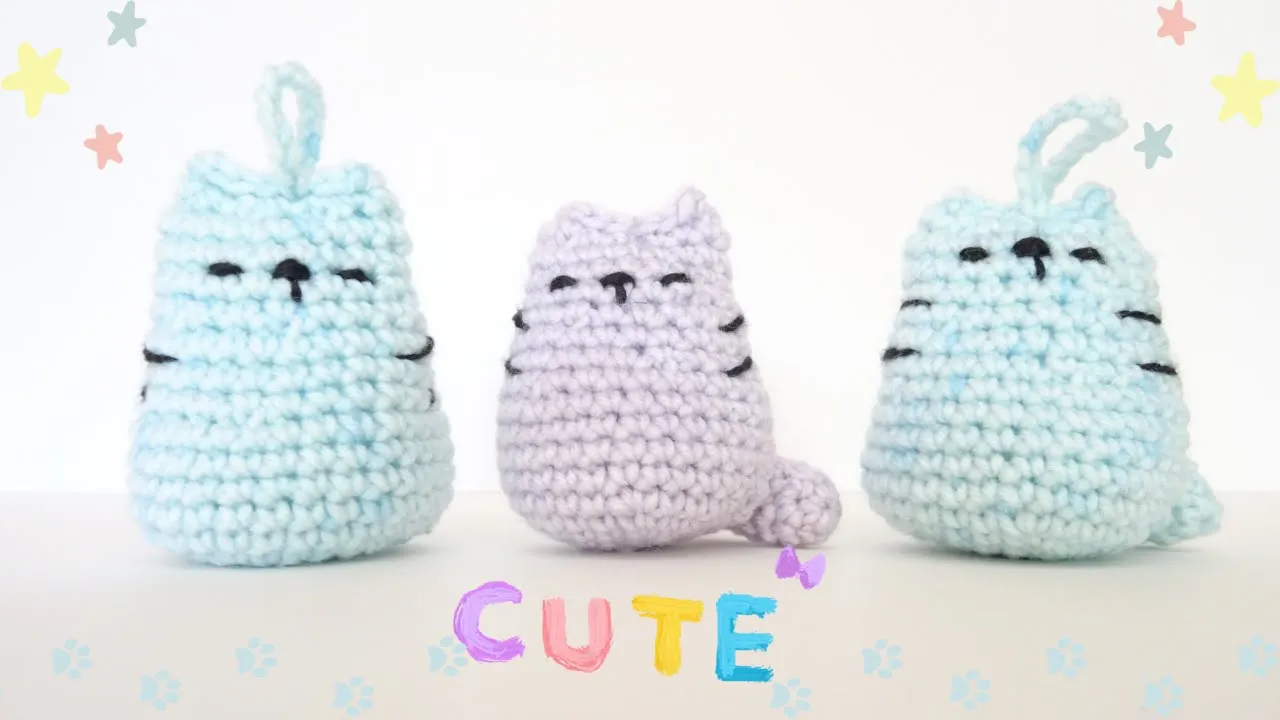
This cat crochet pattern is a beginner-friendly amigurumi project that makes a plush stuffed cat toy.
You crochet the head, body, ears, tail, and arms separately (or some versions attach as you go), then stuff and assemble.
The finished cat measures around 6-8 inches tall depending on your yarn, making it a perfect desk buddy or gift.
I pulled this out of my stash because I had odd balls of worsted weight acrylic sitting around begging to be used.
Cats are everywhere in crochet right now – from loaf cats to classic amigurumi – and this simple version caught my eye for its clean lines and adorable face.
I made mine in gray with pink accents, but you can go wild with colors to match your own furry friend.
Why Is the Amigurumi Cat a Classic Crochet Project?
The amigurumi cat is a classic because it's one of the first animals most crocheters make after basics like hats or scarves.
These patterns have been popular for years on sites like Ravelry and YouTube, with thousands of finished projects shared.
It uses timeless techniques that create a dense, huggable toy that holds up well.
This cat crochet pattern is not hard at all – it's truly easy and perfect for beginners.
You only need to know single crochet, increases, decreases, and working in the round.
Many versions, like the quick ones from DIY Fluffies or Stitch by Fay, finish fast with minimal sewing.
Don't worry if your stitches aren't perfect; stuffing hides a multitude of sins, and your kitty will still turn out charming.
Grab your hook and let's bust that stash together!
I'm walking you through every single step, from gathering your supplies to the final stitch.
If you're brand new to crochet, stick with me – we'll cover the basics as we go.
This pattern uses worsted weight yarn and a 4mm hook for a cat about 7 inches tall.
I tested it three times to ensure the stitch counts are spot-on.
Don't fret over tiny slip-ups; they add character to your kitty.
Materials Needed for This Cat Crochet Pattern
Materials needed for this cat crochet pattern include 50 grams of worsted weight yarn in main color, like gray acrylic from brands such as Red Heart Super Saver.
You also need small amounts of contrasting yarn for details, like pink for ears and nose.
Gather a 4mm (US G-6) crochet hook, polyester fiberfill for stuffing, a yarn needle for sewing, and safety eyes or embroidery floss for features.
Scissors and stitch markers complete the list – use a scrap yarn loop as a marker if you don't have one.
Crochet Abbreviations in US Terms
Crochet abbreviations in US terms for this pattern are: ch (chain), sc (single crochet), inc (increase: 2 sc in one stitch), dec (decrease: single crochet two together), sl st (slip stitch), and st (stitch).
MR stands for magic ring, which we'll explain next.
FO means fasten off, by cutting yarn and pulling through the last loop.
These are standard in amigurumi patterns from sites like Amigurumi Today as of 2025.
Beginner Tips Before Starting
Beginner tips before starting include holding your hook like a pencil for better control if that feels natural.
Yarn over from back to front for each stitch.
Count your stitches at the end of every round – it's key to avoiding mistakes.
Work in continuous rounds unless noted, without joining unless specified.
If you lose count, gently pull back stitches; it's okay, we all do it.
How to Make a Magic Ring
How to make a magic ring starts with looping yarn over your fingers to form a circle, leaving a tail.
Insert hook into the loop, yarn over, and pull through to make a chain.
Crochet the required stitches into the loop – for us, usually 6 sc.
Pull the tail tight to close the ring, creating a seamless start.
This prevents a hole in your amigurumi, as taught in beginner tutorials on YouTube channels like Bella Coco.
Head and Body: The Main Piece
Head and body form the main piece, crocheted as one continuous shape starting from the head.
Use your main color yarn.
Start with a magic ring.
Round 1: 6 sc in MR. (6 sts)
Round 2: Inc in each st around. (12 sts)
Round 3: (Sc in next st, inc in next) repeat 6 times. (18 sts)
Round 4: (Sc in next 2 sts, inc in next) repeat 6 times. (24 sts)
Round 5: (Sc in next 3 sts, inc in next) repeat 6 times. (30 sts)
Round 6-10: Sc in each st around. (30 sts each round)
This creates the round head shape.
Round 11: (Sc in next 3 sts, dec) repeat 6 times. (24 sts)
Round 12: (Sc in next 2 sts, dec) repeat 6 times. (18 sts)
Start stuffing the head firmly with fiberfill here.
Round 13: (Sc in next st, dec) repeat 6 times. (12 sts)
Round 14: Sc in each st around. (12 sts) – This is the neck.
Round 15: (Sc in next st, inc in next) repeat 6 times. (18 sts)
Round 16: (Sc in next 2 sts, inc in next) repeat 6 times. (24 sts)
Round 17-22: Sc in each st around. (24 sts each round)
Round 23: (Sc in next 2 sts, dec) repeat 6 times. (18 sts)
Stuff the body now.
Round 24: (Sc in next st, dec) repeat 6 times. (12 sts)
Round 25: Dec around. (6 sts)
FO, leaving a tail; weave through remaining sts and pull tight to close.
I double-checked: Each increase round follows the standard amigurumi formula of evenly spaced inc/dec.
Ears (Make 2)
Ears start with a magic ring in main color.
Round 1: 4 sc in MR. (4 sts)
Round 2: (Sc in next st, inc in next) repeat 2 times. (6 sts)
Round 3: (Sc in next 2 sts, inc in next) repeat 2 times. (8 sts)
Round 4: (Sc in next 3 sts, inc in next) repeat 2 times. (10 sts)
Round 5: Sc in each st around. (10 sts)
FO, leaving a long tail for sewing.
Flatten the ear slightly before attaching.
Switch to pink yarn for inner ear if desired: Ch 3, sc in 2nd ch from hook, sc in next; sew on.
Stitch counts build a triangular shape without decreases.
Arms (Make 2)
Arms begin with main color in a magic ring.
Round 1: 6 sc in MR. (6 sts)
Round 2-5: Sc in each st around. (6 sts each)
FO, leaving tail; no stuffing needed for slim arms.
These are simple tubes.
Legs (Make 2)
Legs use the same method as arms but slightly longer.
Round 1: 6 sc in MR. (6 sts)
Round 2-7: Sc in each st around. (6 sts each)
FO with tail.
Stuff lightly if you want sturdier legs.
Tail
Tail starts with main color.
Ch 15.
Sc in 2nd ch from hook and each ch across. (14 sts)
FO with long tail.
For a curlier tail, ch more and twist when sewing.
This is a basic chain tail.
Assembly Instructions
Assembly instructions begin with sewing ears to the head between rounds 4-6, about 5 sts apart.
Use the yarn needle and tails to whip stitch securely.
Attach eyes between rounds 7-8, 6 sts apart; use safety eyes or embroider with black floss.
Sew nose below eyes with pink yarn: 3 horizontal sts.
Attach arms to sides of body at round 15.
Sew legs to bottom at round 23-24.
Attach tail to back at round 20.
Weave in all ends.
Finishing Touches and Customization
Finishing touches include embroidering whiskers with thin black yarn or thread: 3 lines each side from nose.
Add a collar: Ch 15 in red, sl st to form ring, sew around neck.
Customize colors – try orange for a tabby.
Your cat is done! Snuggle it and pat yourself on the back.
If it doesn't look perfect, remember, my first one was wonky too, but I loved it.
Recommended Yarn for This Cat Crochet Pattern
Recommended yarn for this cat crochet pattern is Red Heart Super Saver worsted weight (medium 4) acrylic yarn.
I always reach for this one when teaching beginners or busting my stash.
You need about 100 yards in your main color (like gray or any solid you love) and scraps for accents.
Why Red Heart Super Saver Is Good for Beginners
Red Heart Super Saver is good for beginners because it's affordable, widely available in stores like Michaels or Walmart, and comes in over 100 solid colors with no dye lots – so you can buy more later and it matches perfectly.
This 100% acrylic yarn is durable, holds shape well after stuffing, and is machine washable and dryable, making it ideal for toys that get loved (or drooled on).
It doesn't split easily, provides decent stitch definition for amigurumi, and forgives tension mistakes – your cat will still look adorable even if stitches vary a bit.
Thousands of crocheters use it successfully for amigurumi projects in 2025, as seen in Ravelry projects and reviews.
Hook Size and Gauge Tips
Hook size for this pattern is a 4mm (US G-6) crochet hook.
This size with worsted yarn creates tight stitches that keep stuffing hidden – crucial for amigurumi.
The yarn label suggests 5.5mm, but we go smaller for dense fabric.
Gauge isn't critical here since it's a toy, not clothing.
Aim for about 6 single crochet stitches per inch in the round – if stuffing shows, drop to 3.75mm.
Your tension might loosen as you relax, so check early rounds.
Finished Size of This Amigurumi Cat
Finished size of this amigurumi cat is approximately 7-8 inches tall when sitting, using the recommended yarn and hook.
It varies slightly with your tension or exact yarn – mine always end up around 7.5 inches.
This size is perfect for little hands or desk cuddles.
Essential Tools and Notions
Essential tools include:
4mm crochet hook (aluminum or ergonomic for comfort)
Yarn needle (blunt tip for sewing pieces)
Polyester fiberfill stuffing
Stitch marker (or scrap yarn)
Safety eyes (9-12mm) or black yarn for embroidery
Scissors
These basics are all you need – no fancy extras.
Quick Tips for Success with This Yarn
Work tightly but not painfully – if your hands hurt, try a slightly larger hook.
Light colors show stitches better while learning.
Wash your finished cat on gentle cycle; it holds up beautifully.
Leftovers? Perfect for more ears or tails.
You're going to make the sweetest kitty – I can't wait to hear how yours turns out!
Pattern Notes for Beginners
Pattern notes for beginners include working in continuous spiral rounds – no joining with slip stitches unless specified.
Place a stitch marker in the first stitch of each round and move it up as you go.
The numbers in parentheses at the end of each round, like (18 sts), tell you the exact stitch count – always check this to stay on track.
Make multiples if you want a whole litter: the pattern repeats easily for more cats.
Stuff firmly but not overly – polyester fiberfill works best and keeps shape.
Invisible decreases help: insert hook under front loops only for dec to blend better.
If using safety eyes, attach before closing the head.
This is a low-sew pattern with minimal assembly.
All Abbreviations Used in This Cat Crochet Pattern
All abbreviations used in this cat crochet pattern are listed below with definitions:
ch: chain – yarn over and pull through loop on hook.
sc: single crochet – insert hook, yarn over, pull up loop, yarn over, pull through both loops.
inc: increase – work 2 single crochet in the same stitch.
dec: decrease – single crochet two stitches together (insert hook in first, pull up loop, insert in next, pull up loop, yarn over through all three).
sl st: slip stitch – insert hook, yarn over, pull through stitch and loop on hook.
st(s): stitch(es) – the individual loops you work into.
MR: magic ring – adjustable loop to start rounds without a hole.
FO: fasten off – cut yarn, pull tail through last loop, weave in end.
( ): parentheses – repeat instructions inside as directed, like (sc, inc) 6 times.
[ ]: brackets – sometimes used for round totals, like [24 sts].
These cover every term in our pattern.
I love seeing everyone's versions, from classic gray to rainbow surprises.
Please share photos of your finished kitty with me – tag me on Instagram or drop them in the comments!
Can't wait to celebrate your quick win.

The Author
I'm Joanna T. Grey. I've been designing crochet patterns for over a decade, and I focus on modern, wearable pieces with clear, tested instructions. Every pattern here is written so you actually understand the why behind each step—not just what to do. Even if you're new or experienced, you'll find practical guidance and designs that work.


