
Free Chunky Pom-Pom Beanie Crochet Pattern
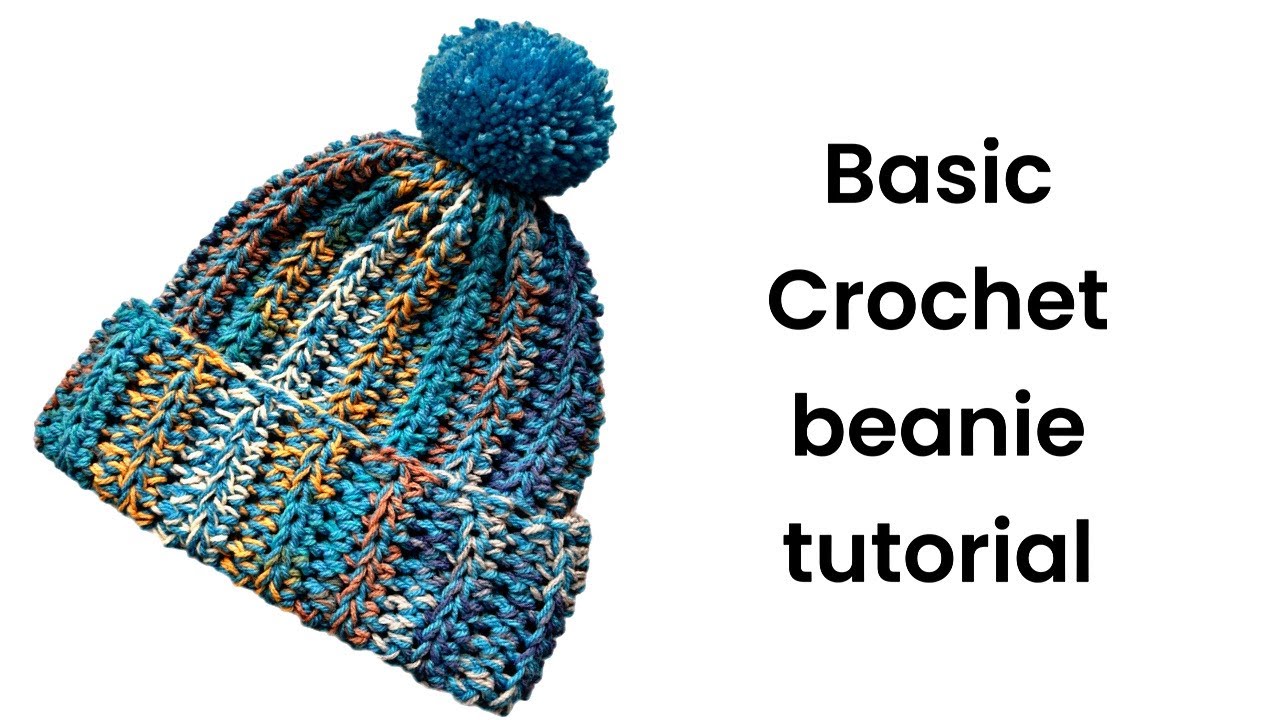
This chunky slouchy pom-pom beanie design is a hat with textured stitches, fluffy faux-fur pom-poms, and small brown leather tags. It works up fast in super bulky yarn using only half double crochet in the back loop. The result is a soft, stretchy, slouchy hat that looks boutique-made but costs little to make.
The pattern stays simple on purpose. Chain a short rectangle, work rows in back loop only, seam the sides, and cinch the top. Add the pom-pom and tag, and the hat is finished. Most makers complete it in 45 to 75 minutes once they have the rhythm.
Easiest FREE BEANIE You’ll Crochet (in 1 Hour!) Chunky Slouchy Textured Pom-Pom Beanie

Why You'll Love This Beanie Pattern
This beanie delivers instant satisfaction. The back-loop-only half double crochet creates a beautiful textured fabric that looks complex but requires no advanced skills. Super bulky yarn makes the project grow quickly, so you see progress after just a few rows.
Current prices keep it budget-friendly. A skein of Lion Brand Wool-Ease Thick & Quick (the top recommendation for this weight) runs around $8–13 at major retailers like Amazon, Walmart, or Lion Brand’s site, depending on the color. One skein is usually enough for an adult size, sometimes with yarn left for a second project.
Ravelry data from early 2026 shows simple chunky beanies remain among the most favorited free hat patterns, especially those promising under-an-hour makes. Makers love the slouchy fit and how easily the hats coordinate with jackets or scarves.
One maker shared that her first attempt took closer to 90 minutes because she kept checking tension, but the second flew by in under an hour. That quick improvement is common and builds real confidence.
Perfect for Beginners? Yes — Here's Why
This pattern uses only two stitches: chain and half double crochet in the back loop. No increases, no decreases in the round, and no complicated shaping. The entire body is a flat rectangle that you seam later.
The stitch count stays consistent at 24 half double crochets per row after the foundation. This removes the guesswork that trips up many new crocheters in traditional in-the-round hat patterns.
If you have completed a simple beginner crochet scarf or washcloth, you already have the skills needed here. The back loop technique adds texture without changing the basic motion.
Troubleshooting is straightforward. If the rectangle feels too narrow after 40 rows, add 2–4 more rows for extra slouch or width. Tension issues often resolve naturally with the chunky yarn’s forgiveness. Many first-time hat makers on the site report finishing this as their breakthrough wearable project.
For more beginner support, explore the best yarn for crochet beginners guide or the collection of easy free crochet patterns for beginners. Both pages offer extra tips that pair well with this fast beanie.
Materials Needed
Gather these supplies before starting. One skein of super bulky yarn covers most adult heads with some leftover. An 8 mm or 9 mm hook works best with this weight. A large faux-fur pom-pom and optional leather tag finish the look.
Yarn — 90–110 yards of #6 super bulky weight.
Hook — 8 mm (L/11) or 9 mm (M/N) crochet hook.
Notions — Large 3–4 inch faux-fur pom-pom, tapestry needle, scissors, optional 1.5" x 1" brown faux leather tag.
These items keep the project affordable and portable. Many makers already own the hook and needle from earlier projects.
Best Yarn Choices for This Chunky Beanie
Lion Brand Wool-Ease Thick & Quick stands out as the top pick. It offers excellent stitch definition, softness, and durability at roughly $8–13 per skein in 2026. The acrylic-wool blend feels warm without itching, making it ideal for beginners who want a polished result.
Bernat Softee Chunky serves as a strong budget alternative, often priced $6–10. Its smooth texture works smoothly in back loops and produces the same chunky fabric seen in the viral photos.
For solid colors that match the cream, sage teal, and deep teal in the original image, check current stock at Joann, Michaels, or online. These brands hold tension well and resist splitting, which reduces frustration for new crocheters.
If you prefer a different fiber, any #6 super bulky yarn with similar yardage works. Test a small swatch first to confirm drape.
Gauge, Size Guide & Must-Have Tools
Gauge is forgiving here but helpful for fit. Aim for 7 half double crochets and 6 rows to equal 4 inches by 4 inches. The pattern calls for chaining 26 to start, then working 24 half double crochets per row after the foundation chain.
Adult size measures approximately 20–23 inches in circumference and 9–10 inches tall when finished, giving a relaxed slouch. For a snugger fit, work only 42–44 rows. Add 3–4 rows for extra slouch.
Tools checklist:
- 8 mm or 9 mm hook
- Tapestry needle for seaming and weaving ends
- Sharp scissors
- Measuring tape
- Optional: hot glue or needle and thread for the pom-pom and tag
To tweak for a child, chain 20–22 and work 36–40 rows. The same rectangle method applies, keeping everything simple.
This pattern pairs nicely with other easy wearables. See the easy free crochet ribbed beanie pattern or the free crochet cat ear hat pattern for more quick hat ideas. For yarn selection tips, the beginner resources on the site help match fiber to project.
Pattern Notes & Tips Before You Start
Read through these notes completely before picking up your hook. The entire beanie is worked flat as a rectangle, which eliminates the need for joining rounds or complex shaping. This approach keeps every row identical after the starting chain, making it easy to maintain consistent tension.
Work all stitches in the back loop only starting from row 2. This technique creates the signature raised texture visible in the original Pinterest-style cream, sage teal, and deep teal beanies. Insert your hook only under the back loop of each stitch — the one farthest from you when the right side faces up.
Count stitches carefully at the end of each row. After the foundation, every row must have exactly 24 half double crochets. If you lose or gain stitches, it usually comes from skipping the first stitch or adding an extra one at the end. Count out loud the first few times until the rhythm feels natural.
The finished rectangle should measure roughly 20–22 inches wide before seaming. Stretch it gently while measuring because the chunky yarn has natural give. For a more slouchy fit, continue to 50–52 rows. A snugger adult fit needs 42–46 rows. Always err on the side of adding rows — it is simpler to adjust width than to rip out later.
Turn your work consistently at the end of each row with a chain 1. This keeps the edges straight and even. If the edges start to curl, relax your grip on the hook slightly. Super bulky yarn forgives minor tension variations better than finer weights.
When seaming and cinching, use a long yarn tail of at least 20 inches. This gives enough length to pull the top closed securely without running short. Weave ends thoroughly on the inside so they stay hidden even after washing.
Abbreviations Explained
All instructions use standard US crochet terms. Here is every abbreviation used in this pattern with a clear explanation and usage tip.
- ch — chain. Yarn over and pull through the loop on your hook. Used only at the very beginning to create the foundation (ch 26) and at the start of each row (ch 1, turn).
- HDC — half double crochet. Yarn over, insert hook into the stitch (or back loop), yarn over and pull up a loop, yarn over and pull through all three loops on the hook. This is the only stitch used for the body after the foundation row.
- BLO — back loop only. Work the stitch into the back loop of the previous row instead of both loops. This creates the raised, ribbed texture that makes the beanie look more intricate than it actually is.
- st(s) — stitch(es). Refers to the individual half double crochets in each row. Always aim for 24 sts after row 1.
These four terms cover the entire pattern. No slip stitches, single crochets, or decreases appear until the optional seaming step. The simplicity means you can focus on even tension and counting rather than learning new stitches mid-project.
If you need a refresher on the half double crochet or back loop technique, the site’s beginner tutorials walk through them slowly with close-up photos. Many new crocheters master this exact combination on their first or second attempt.
The pattern remains fully reversible until you add the pom-pom and tag. The right side and wrong side look nearly identical, so do not worry about which side faces out when seaming. Choose whichever side you prefer for the finished hat.
This quick beanie pairs well with other easy projects on the site, such as the free crochet cat beanie pattern, the easy free beginner crochet hat pattern, or the easy free crochet ribbed beanie pattern. For yarn guidance, see the best chunky yarn for beginners or best yarn for crochet beginners.
Step-by-Step Pattern Instructions
This chunky slouchy pom-pom beanie follows a straightforward rectangle method. Work flat, seam the sides, cinch the top, and add the finishing touches. The stitch count stays steady at 24 half double crochets per row after the foundation, so counting remains simple.
Foundation and Body
Row 1: Chain 26. Half double crochet in the third chain from the hook and in each chain across. You will have 24 half double crochets. Turn.
Rows 2 through 48 (or to desired width): Chain 1 and turn. Work one half double crochet in the back loop only of each stitch across. Maintain exactly 24 stitches per row.
Continue until the rectangle measures approximately 20–22 inches wide when gently stretched. Most adults need 46–52 rows for a nice slouch. For a snugger fit, stop at 42–44 rows. The back-loop-only technique creates the raised texture visible in the original image without any extra effort.
Check your work every 10 rows. If the width feels too narrow, add 2–4 extra rows. Super bulky yarn stretches nicely once seamed, so slight variations rarely affect the final fit.
Assembly and Finishing
Fold the rectangle so the two short ends (each with 24 stitches) meet right sides together. Seam the side edges using either a slip stitch with your hook or a whip stitch with a tapestry needle and matching yarn. This creates a tube. Turn the tube right side out so the textured side faces outward.
Cut a long tail of about 20–24 inches from the working yarn or a new strand. Thread it onto your tapestry needle. Weave the needle in and out around the top opening of the tube, catching every other stitch or every stitch for security. Pull the yarn firmly to cinch the top closed completely. Tie a secure knot on the inside and weave the end in thoroughly.
Attach a large 3–4 inch white faux-fur pom-pom to the center of the cinched top. Use the pom-pom’s attached thread or sew it securely with matching yarn. For the signature detail seen in the Pinterest photos, sew or glue a small 1.5" x 1" brown faux leather tag to the side of the brim, about 1–2 inches up from the bottom edge.
Weave in all remaining ends on the inside of the hat. Give the beanie a gentle block by lightly steaming or wetting and shaping it over a bowl or balloon if desired. The chunky texture usually settles beautifully on its own.
This completes the exact beanie shown in the viral image — soft, textured, slouchy, and finished with that fluffy pom-pom and leather tag detail. The entire process typically takes 45–75 minutes once you find your rhythm.
For more quick hat inspiration, check out the easy free crochet ribbed beanie pattern, the free crochet cat beanie pattern, or the free cat ear crochet hat pattern. Beginners may also enjoy the easy beginner crochet hat pattern for additional practice with similar techniques. Yarn selection guidance is available in the best chunky yarn for beginners and best yarn for crochet beginners.
If you want a different texture, try the even mixed loop crochet hat free textured beanie next. Happy crocheting — your finished beanie will look just like those beautiful Pinterest versions.
Easy Variations & Custom Ideas
Change the row count to adjust the slouch factor. Stop at 40 rows for a closer-fitting beanie or continue to 55 rows for maximum oversized slouch that drapes softly over the ears. The chunky yarn responds well to these tweaks without losing structure.
Experiment with color blocking. Work the first 8–10 rows in one shade for a folded brim effect, then switch to a contrasting color for the body. This creates the same textured look while adding visual interest that matches popular 2026 trends on Ravelry.
Omit the leather tag for a minimalist version or replace the white faux-fur pom-pom with a yarn pom-pom made from the same super bulky yarn. A handmade yarn pom-pom gives a softer, more casual finish and uses up leftover scraps.
For smaller sizes, chain 20–22 and work 36–40 rows. This produces a child-sized beanie with the same texture and pom-pom detail. The rectangle method scales easily and keeps stitch counts straightforward.
Add simple stripes by changing colors every 6–8 rows. Alternate the original cream, sage teal, and deep teal shades to recreate a coordinated set perfect for family gifts or charity donations.
Common Troubleshooting and Fixes
If the rectangle width falls short of 20 inches after 48 rows, add 2–4 extra rows before seaming. The super bulky yarn stretches during wear, so slight under-sizing often corrects itself once the hat is finished and blocked lightly.
Edges curling or looking uneven usually comes from tight tension on the turning chain. Loosen your grip slightly on the hook and make sure the chain 1 at the start of each row is not pulled too snug. Most makers notice this improves naturally after the first 10 rows.
When cinching the top, if the yarn tail feels too short, stop and add a new strand joined with a secure knot on the inside. Pull gradually in sections rather than all at once to avoid breaking the yarn or creating puckers.
The pom-pom may sit off-center if the cinching is uneven. Take time to gather stitches symmetrically around the top opening. A few extra passes with the needle ensures the pom-pom anchors firmly in the exact center.
Stitch count dropping below 24 often happens when the first stitch after the chain 1 is skipped. Place the hook explicitly into the back loop of the very first stitch each row. Counting aloud helps establish the habit quickly.
Next-Level Tips
Work the foundation chain loosely to prevent a tight bottom edge. Many experienced makers chain with a hook one size larger, then switch back to the 8 mm or 9 mm for the body rows. This keeps the brim flexible and comfortable.
For extra warmth without added bulk, line the finished beanie with a simple fleece circle cut to size and hand-sewn inside. This upgrade turns the hat into a serious winter essential while preserving the outer textured beauty.
Steam blocking after assembly helps the stitches settle and the slouch even out. Hold the steamer a few inches away and gently shape over a round object like a large bowl. The acrylic-wool blends in Lion Brand Wool-Ease Thick & Quick and Bernat Softee Chunky respond especially well to light moisture.
Try a folded brim by working the last 6–8 rows in both loops instead of back loop only. This creates a subtle ribbed contrast at the bottom that echoes some of the more advanced ribbed beanie patterns while staying beginner accessible.
Current prices remain steady in 2026: Lion Brand Wool-Ease Thick & Quick sits around $7.69–$10.99 per skein depending on retailer and sales, while Bernat Softee Chunky often lands at $4.87–$6.49. Stock up during sales for multiple hats or matching sets.
These tips build directly on the core pattern. Once comfortable, move to textured variations like the even mixed loop crochet hat or explore other quick hats for continued practice.
For more textured hat options, see the even mixed loop crochet hat free textured beanie. Beginners often enjoy the easy beginner crochet hat pattern free or free cat ear crochet hat pattern easy next. Yarn guidance appears in the best chunky yarn for beginners top tested picks and best yarn for crochet beginners. The easy free crochet ribbed beanie pattern offers another fast classic.
Final Thoughts
You now have everything needed to crochet the exact chunky slouchy pom-pom beanie featured in those popular Pinterest photos. The simple rectangle construction, consistent 24-stitch rows, and back-loop-only texture make this one of the most approachable wearable projects available. In under an hour, you can create a soft, professional-looking hat in cream, sage teal, deep teal, or any color you choose.
The forgiving nature of super bulky yarn means small tension differences rarely show in the finished piece. Most makers finish their first version feeling proud and ready to start another in a different shade. This pattern delivers quick success while teaching core skills that transfer to many other hat designs.
Share Your Finished Beanie!
Take a clear photo of your completed beanie — front view, side view with the pom-pom and leather tag detail, and one worn if possible. Share it in the comments below or tag the site on social media. Seeing your color choices and custom tweaks inspires other readers and helps beginners visualize their own results.
Your finished hat may become someone else’s confidence booster. Every version adds to the growing collection of quick makes from this pattern.
You Might Also Love These Patterns
- Even Mixed Loop Crochet Hat Free Textured Beanie – Explore another easy textured hat with a different stitch pattern.
- Free Crochet Cat Beanie Pattern Easy – Add fun ears to a similar quick beanie base.
- Easy Beginner Crochet Hat Pattern Free – A gentle next step for new crocheters.
- Free Cat Ear Crochet Hat Pattern Easy – Playful ear details on a fast rectangle-style hat.
- Easy Free Crochet Ribbed Beanie Pattern – Classic ribbed texture in a similar speedy format.
- Easy Ribbed Crochet Beanie Pattern Free – Another beginner-friendly ribbed option.
- Summer Sun Hat Crochet Pattern Free – Lightweight hat for warmer days once you master quick construction.

The Author
I'm Joanna T. Grey. I've been designing crochet patterns for over a decade, and I focus on modern, wearable pieces with clear, tested instructions. Every pattern here is written so you actually understand the why behind each step—not just what to do. Even if you're new or experienced, you'll find practical guidance and designs that work.


