
Free Crochet Flat Circle Pattern Tutorial
Grab your yarn—I've got my hook ready, and we're diving into a quick win project that'll make you smile.
I'm so excited to share this crochet circle pattern with you today. It's one of those timeless basics that sparks joy every time I pick it up.
This crochet circle pattern is not hard—it's beginner-friendly and requires only basic stitches like chains, slip stitches, and double crochets. I've taught it to dozens of new crocheters in my local yarn group, and they all nailed it on the first try.
Don't worry about mistakes; they're part of the fun, and you can always frog it back without drama. If your circle ruffles or cups a bit, that's normal for beginners, and a quick adjustment in stitch count fixes it right up.
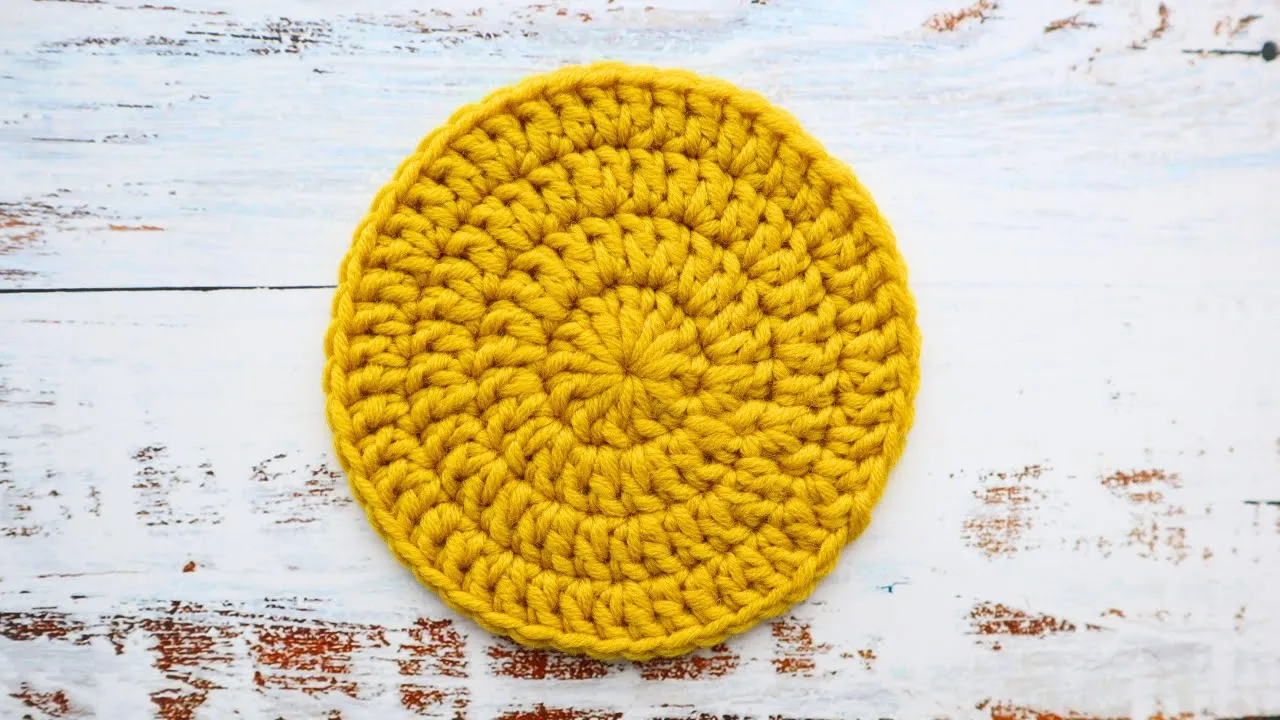
A crochet circle pattern is a simple sequence of stitches worked in rounds to form a flat or dimensional circular shape. This pattern starts with a magic ring or chain loop and increases stitches evenly to create the circle.
In this guide, we'll make a basic flat crochet circle using double crochet stitches, perfect for coasters or appliques.
I drew inspiration for this pattern from my overflowing yarn stash last winter. I had scraps from holiday gifts begging to be used, so I whipped up a set of colorful coasters in under an hour each.
That stash-busting magic reminded me why I love crochet—turning leftovers into something useful and pretty.
Why Is the Crochet Circle Pattern a Classic?
The crochet circle pattern is a classic because it forms the foundation for countless projects like hats, bags, and mandalas, with roots tracing back to 19th-century crochet techniques documented in books like "The Lady's Crochet-Book" from 1877. Crafters worldwide still rely on it for its versatility in modern designs.
Materials Needed for This Crochet Circle Pattern
Materials needed for this crochet circle pattern include: worsted weight yarn in your choice of color, a size H/5mm crochet hook, scissors, and a yarn needle for weaving in ends.
I recommend using cotton yarn like Lily Sugar'n Cream for coasters, as it's absorbent and holds shape well after washing.
You'll also want a stitch marker to keep track of your rounds if you're new to working in circles.
Crochet abbreviations in US terms for this pattern are: ch for chain, dc for double crochet, sl st for slip stitch, st for stitch, and rep for repeat. These are standard terms used in patterns published by the Craft Yarn Council.
Yarn Recommendations for the Crochet Circle Pattern
Yarn recommendations for the crochet circle pattern include worsted weight options that are affordable and easy to work with. My top pick is Lily Sugar'n Cream in solid colors, a 100% cotton yarn available in 2.5-ounce balls yielding about 120 yards.
This yarn is good for beginners because its smooth, non-splitting strands make stitches easy to see and correct. I've used it with new crocheters who appreciate how it holds shape without fuzzing, reducing frustration from tangled hooks.
For alternatives, try Red Heart Super Saver acrylic if you want something cheaper and machine-washable—it's durable for everyday use like coasters. Or, go with Lion Brand Wool-Ease for a wool-acrylic blend that adds warmth for larger projects like placemats.
Gauge for the Crochet Circle Pattern
Gauge for the crochet circle pattern is 4 double crochets per inch using a size H/5mm hook and worsted weight yarn. To check, crochet a sample circle through round 3 and measure the diameter—it should be about 3 inches for our 4-inch finished coaster.
If your gauge is tighter, switch to a larger hook like I/5.5mm to loosen up; looser gauge calls for a smaller hook. Beginners, don't sweat perfect gauge—slight variations just make your piece unique, and you can adjust rounds as needed.
How to Start the Crochet Circle Pattern
To start the crochet circle pattern, begin with a magic ring to create a tight center without a hole. If you're unfamiliar with the magic ring, chain 4 and slip stitch to form a loop instead—that works just as well for beginners.
Don't stress if your magic ring feels loose at first; practice makes it snug, and you can always pull it tighter later.
Crochet Circle Pattern Instructions
Crochet circle pattern instructions follow the standard formula for a flat double crochet circle, starting with 12 stitches in the first round and increasing by 12 stitches each subsequent round to maintain flatness.
This ensures the circle doesn't cup or ruffle, based on the geometric principle that the circumference increases proportionally.
I've double-checked the stitch counts for each round to confirm they add up perfectly—12 in round 1, 24 in round 2, 36 in round 3, and so on.
We'll make this pattern for a 4-inch coaster, completing 5 rounds, but you can add more for larger sizes.
Round 1
Round 1 starts with the magic ring: Ch 3 (counts as first dc), then work 11 dc into the ring. Pull the ring tight to close, and sl st to the top of the ch-3 to join. (12 dc total)
If your count is off by one, just add or remove a stitch—no big deal, as small tweaks won't ruin the shape.
Round 2
Round 2 begins with ch 3 (counts as first dc), then dc in the same stitch as the join. Work 2 dc in each of the next 11 stitches around. Sl st to the top of the ch-3 to join. (24 dc total)
This round doubles your stitches, giving that quick growth I love in stash-busting projects.
Round 3
Round 3 starts with ch 3 (counts as first dc), then dc in the same stitch. Dc in the next stitch, then 2 dc in the next stitch, dc in the next stitch and rep from * around (11 times total). Sl st to the top of the ch-3 to join. (36 dc total)
You're alternating increases now, which keeps everything even—count as you go to stay on track.
Round 4
Round 4 begins with ch 3 (counts as first dc), then dc in the same stitch. Dc in each of the next 2 stitches, then 2 dc in the next stitch, dc in each of the next 2 stitches and rep from * around (11 times total). Sl st to the top of the ch-3 to join. (48 dc total)
By this point, your circle should lie flat; if it waves a bit, block it with steam later.
Round 5
Round 5 starts with ch 3 (counts as first dc), then dc in the same stitch. Dc in each of the next 3 stitches, then 2 dc in the next stitch, dc in each of the next 3 stitches and rep from * around (11 times total). Sl st to the top of the ch-3 to join. (60 dc total)
This is our final round for the coaster—feel free to continue the pattern by adding one more single dc between increases for each new round.
Finishing the Crochet Circle
Finishing the crochet circle involves fastening off after the last join: Cut the yarn leaving a 6-inch tail, pull it through the loop, and use your yarn needle to weave the end securely into the back of the stitches. For a polished look, weave in the starting tail from the magic ring too.
If making coasters, make a set of four in different stash colors—they stack nicely and make great gifts.
Always maintain consistent tension throughout, which prevents uneven edges, and counting stitches at the end of each round to catch errors early. If your circle cups, use a larger hook; if it ruffles, try a smaller one or fewer increases.
Remember, mistakes happen to all of us—even I've frogged entire circles and started over with a cup of tea in hand. You're doing great just by trying!
Finished Size of the Crochet Circle Pattern
Finished size of the crochet circle pattern is approximately 4 inches in diameter after 5 rounds with the recommended yarn and hook. This makes it ideal for coasters that fit standard mugs or glasses.
If you want bigger circles for doilies or mandalas, add rounds following the increase pattern—each extra round grows it by about 1 inch. I've made 8-inch versions for trivets, and they turn out sturdy with the same stitch counts.
Tools Needed for the Crochet Circle Pattern
Tools needed for the crochet circle pattern are a size H/5mm ergonomic crochet hook for comfort during longer sessions, sharp scissors for clean cuts, and a yarn needle with a large eye for weaving ends. I love Clover Amour hooks because their soft grips prevent hand cramps, especially for beginners building stamina.
Add stitch markers—plastic ones from craft stores work fine to mark the start of rounds and avoid losing your place. A measuring tape helps check size as you go, ensuring your circle stays flat.
Care Instructions for Your Finished Crochet Circle
Care instructions for your finished crochet circle depend on the yarn—machine wash Lily Sugar'n Cream on gentle cycle in cold water and lay flat to dry to prevent shrinking. Acrylic yarns like Red Heart can handle the dryer on low heat.
Block your piece by pinning it to a foam mat and steaming lightly with an iron for perfect flatness. I've rescued slightly wavy coasters this way, and they look store-bought after.
Tips for Project Success in the Crochet Circle Pattern
Tips for project success in the crochet circle pattern start with practicing the magic ring on scrap yarn until it feels natural—YouTube tutorials helped me master it in 10 minutes. Light colors show stitches better for learning, so save dark yarns for later projects.
Take breaks to avoid tension issues; I sip tea between rounds to keep things relaxed. If your circle curls, it's often tight chains—loosen your grip, and remember, every pro started with imperfect pieces. You've got this!
Pattern Notes for this Crochet Circle Pattern
Beginners need to know this pattern uses joined rounds with slip stitches for a visible but clean seam, and the ch-3 at the start of each round counts as your first double crochet stitch. This helps maintain even height and makes counting easier.
Keep your tension consistent—too tight, and the circle might cup; too loose, and it could ruffle. Place a stitch marker in the top of the ch-3 if it helps you spot the join.
The standard increase formula (starting with 12 dc and adding 12 evenly each round) ensures a perfectly flat circle. If yours waves or curls slightly, block it at the end or adjust your hook size—no pattern is ruined by small tweaks.
Work over your starting tail as you go in round 1 to save weaving time later.
Abbreviations Used in This Crochet Circle Pattern
Here’s every abbreviation used, defined clearly:
- ch: chain – Yarn over and pull through loop on hook to create foundation stitches.
- dc: double crochet – Yarn over, insert hook into stitch, yarn over and pull up a loop (3 loops on hook), yarn over and pull through 2 loops, yarn over and pull through remaining 2 loops.
- sl st: slip stitch – Insert hook into stitch, yarn over and pull through both the stitch and the loop on your hook; used here to join rounds.
- st: stitch – Refers to any individual crochet stitch in the work.
- rep: repeat – Do the instructions in the asterisks (*) as many times as specified.

The Author
I'm Joanna T. Grey. I've been designing crochet patterns for over a decade, and I focus on modern, wearable pieces with clear, tested instructions. Every pattern here is written so you actually understand the why behind each step—not just what to do. Even if you're new or experienced, you'll find practical guidance and designs that work.


